Student
Portfolios as Visual Organizers
for Journey North
| A new Journey North season brings lots of excitement. Students gather information, send in field observations, study maps, calculate migration distances and spend time researching topics of special interest. All of these activities promote rich learning experiences. The challenge is how to organize this vast amount information for project assessment. A creative project portfolio is one answer! | ||
| Easy-to-make
Project Portfolios This lesson shows how to create a 9 X 12 project portfolio where students can for collect, record and display qualitative and quantitative observations, life cycle studies, weather and mapping information and research findings—all in one convenient, creative, easy-to-handle package, and all beginning from Day 1 of a new season of Journey North. |
||
 |
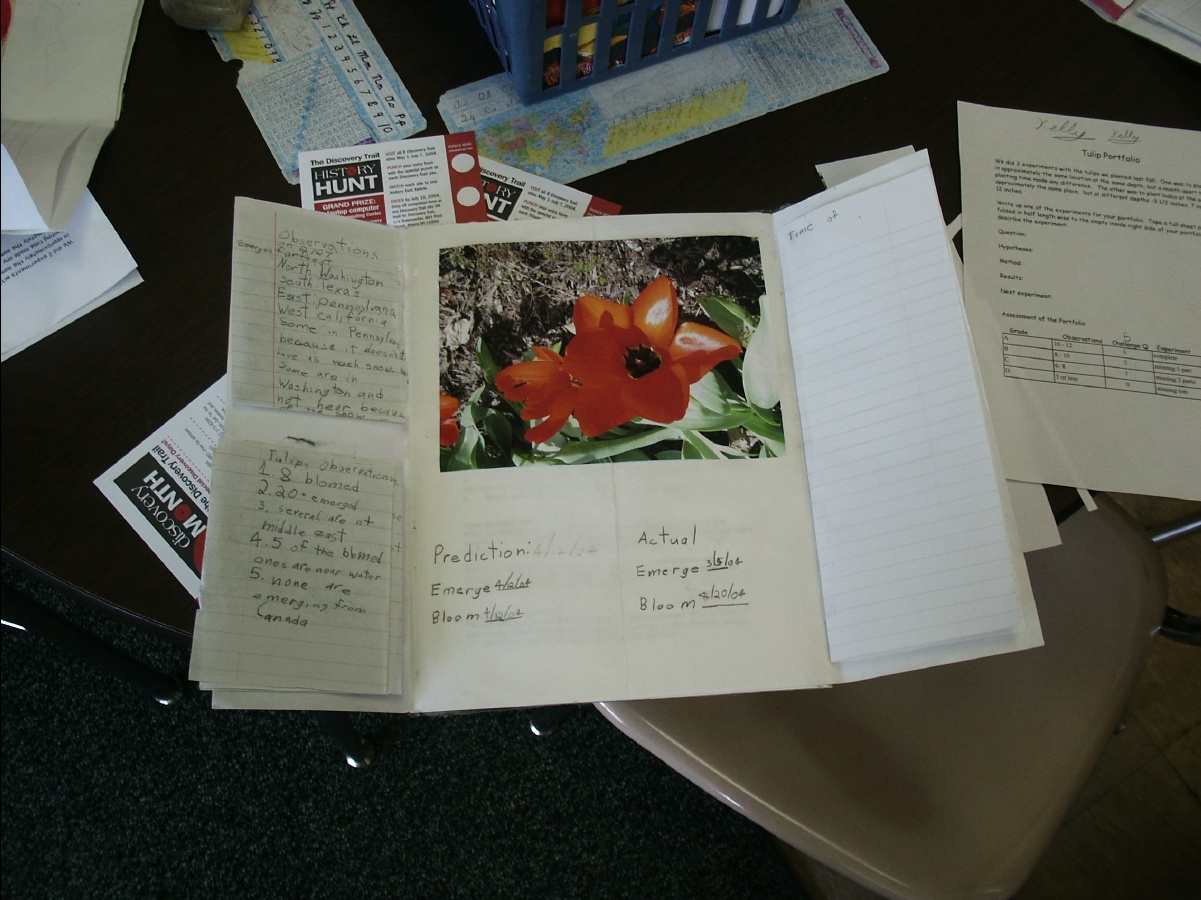
A "shutter" fold student portfolio.
Self-contained organizer makes a simple and complete display. |
 |
| The beauty of this student-made organizer is collection AND display of all Journey North materials in one place. Research notes, maps and reports from quarter-size sheets to full-size pages can be displayed permanently inside one folded portfolio that's kept at school. At the end of the season, all the student work is showcased in this final portfolio made from simple folds. | ||
| How to Make a Portfolio | ||
Materials
|
 Compact investigations unfold into more detailed findings— |
|
Directions for Jacket and Component Pages A. Each student begins with an 11 x 17 sheet of paper. This will be the portfolio jacket. First, make a “shutter”* fold:
B. Next, show students how to build components to use as the project expands. Show them how to:
|
||
Try
This! |
 |
|
© 1997 – 2024 Journey North. All rights reserved.